


The Gesture Set Tab enables us to administrate gesture sets, classes and descriptors. This view as shown in Figure 3 has two main components which are always visible. These are an area to define the gesture and a tree structure to manage the gesture sets and classes.
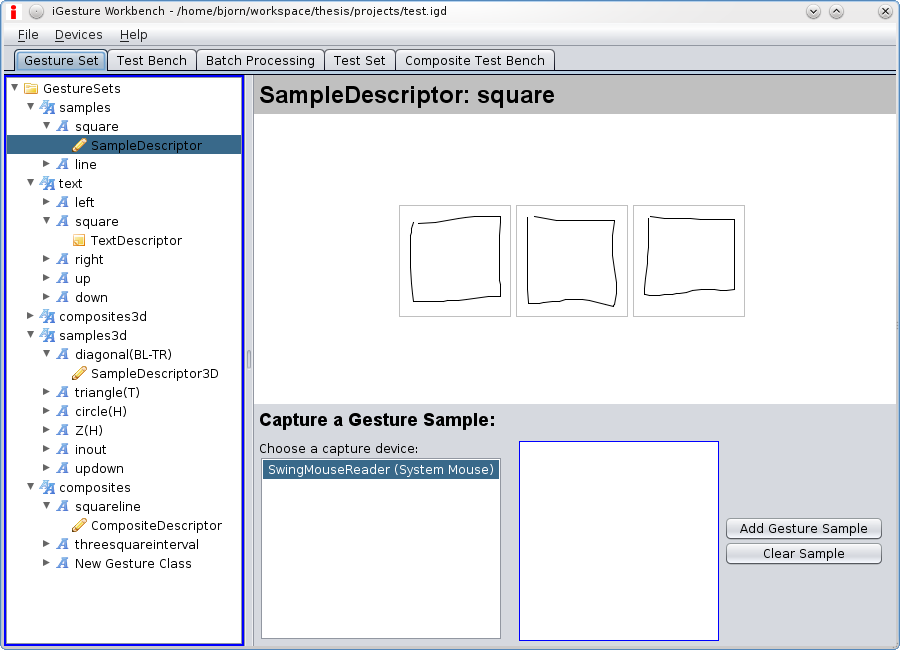
Gesture classes can be created and deleted in the list. These operations are accessible over a context menu. For editing a gesture class, select the descriptor of the gesture class and a new view opens visualising the descriptor. The descriptors can be edited and deleted as well.
The tree representing the gesture sets and the containing classes has several context menus for the operations create, delete, export and import a gesture set and to add gesture classes.
The export and import functionality of set level allows creating and reading XML files containing the set and the corresponding classes with their descriptors. These files can be used for initialising the recogniser and makes it therefore independent of the storage manager.
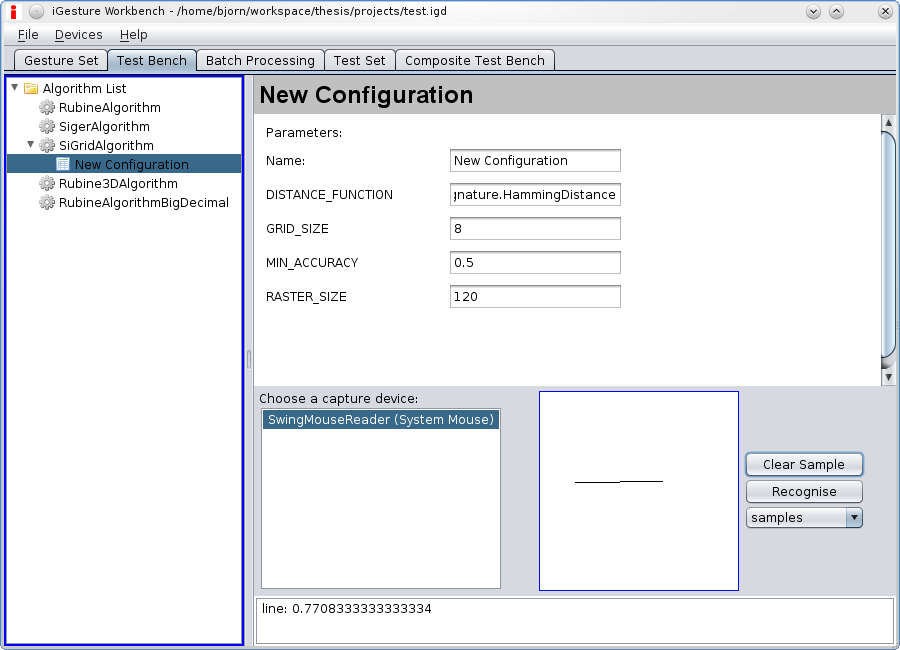
The Test Bench Tab shown in Figure 4 provides functionality to acquire a gesture from the input device and recognise it with the gesture set and algorithm of the user's choice. This enables a simple and quick test of specific gestures. All gesture sets of the currently opened database are available and the algorithms can be selected.
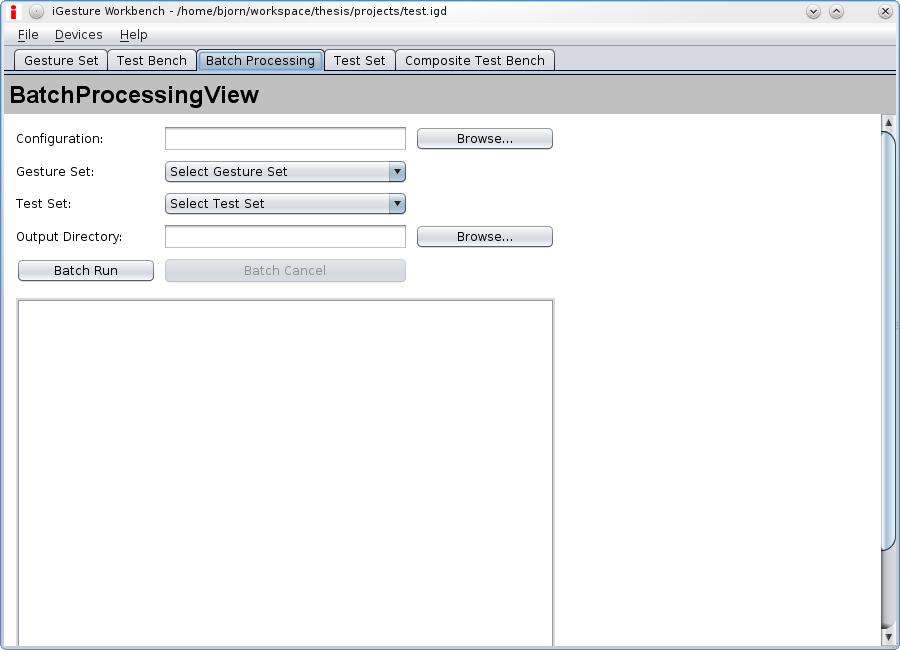
A batch process can be used to determine the most suitable values for the algorithm parameters. To run a batch process, a batch configuration must be provided, a gesture and test set has to be selected and an output directory for the batch process report can be specified. The report itself is also displayed at the bottom after the batch process has finished.
The Test Set Tab shown in Figure 6 can be used to create test sets for testing algorithms and their configuration (e.g. in a batch process). It also has a capture component and a list of available test sets and classes.

Test sets can be created, edited and deleted. Furthermore, we provide functionality to export and import test sets from the corresponding XML representation.
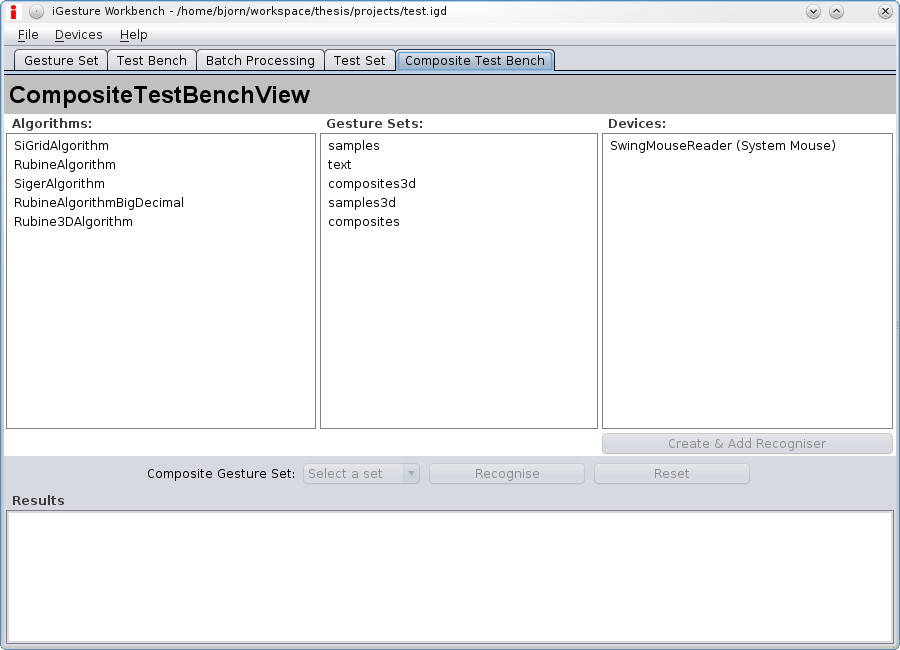
The Composite Test Bench Tab is used to test the recognition of composite gestures. One or more Recognisers can be created by selecting one or more algorithms, gesture sets and devices that send their captured input to the Recogniser. Then the Multi-modal Recogniser can be configured with a gesture set with composite gestures and the recognition process can be started. The recognition results are displayed on the bottom.
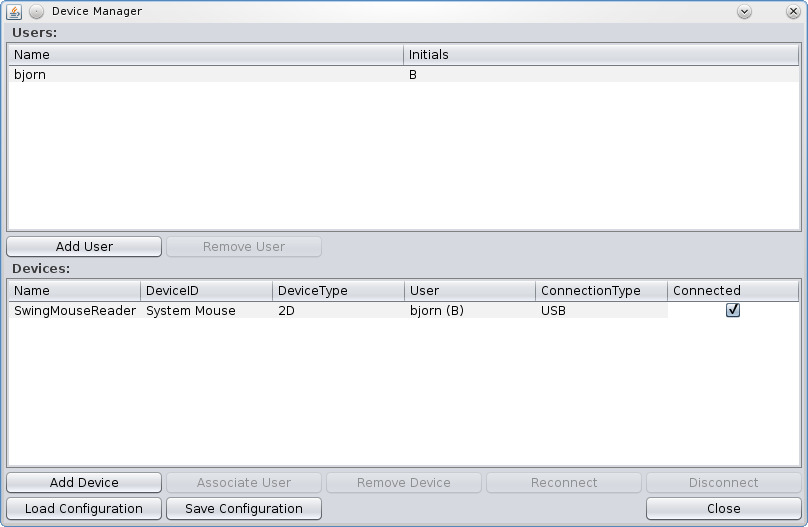
The Device Manager shown in Figure 8 provides functionality to add and remove users and devices. Devices can also be disconnected and reconnected manually. It is possible to associate a user with a device. If you have a fixed setup, it is possible to save this setup to and load it from file. A wizard is used to add a device manually.